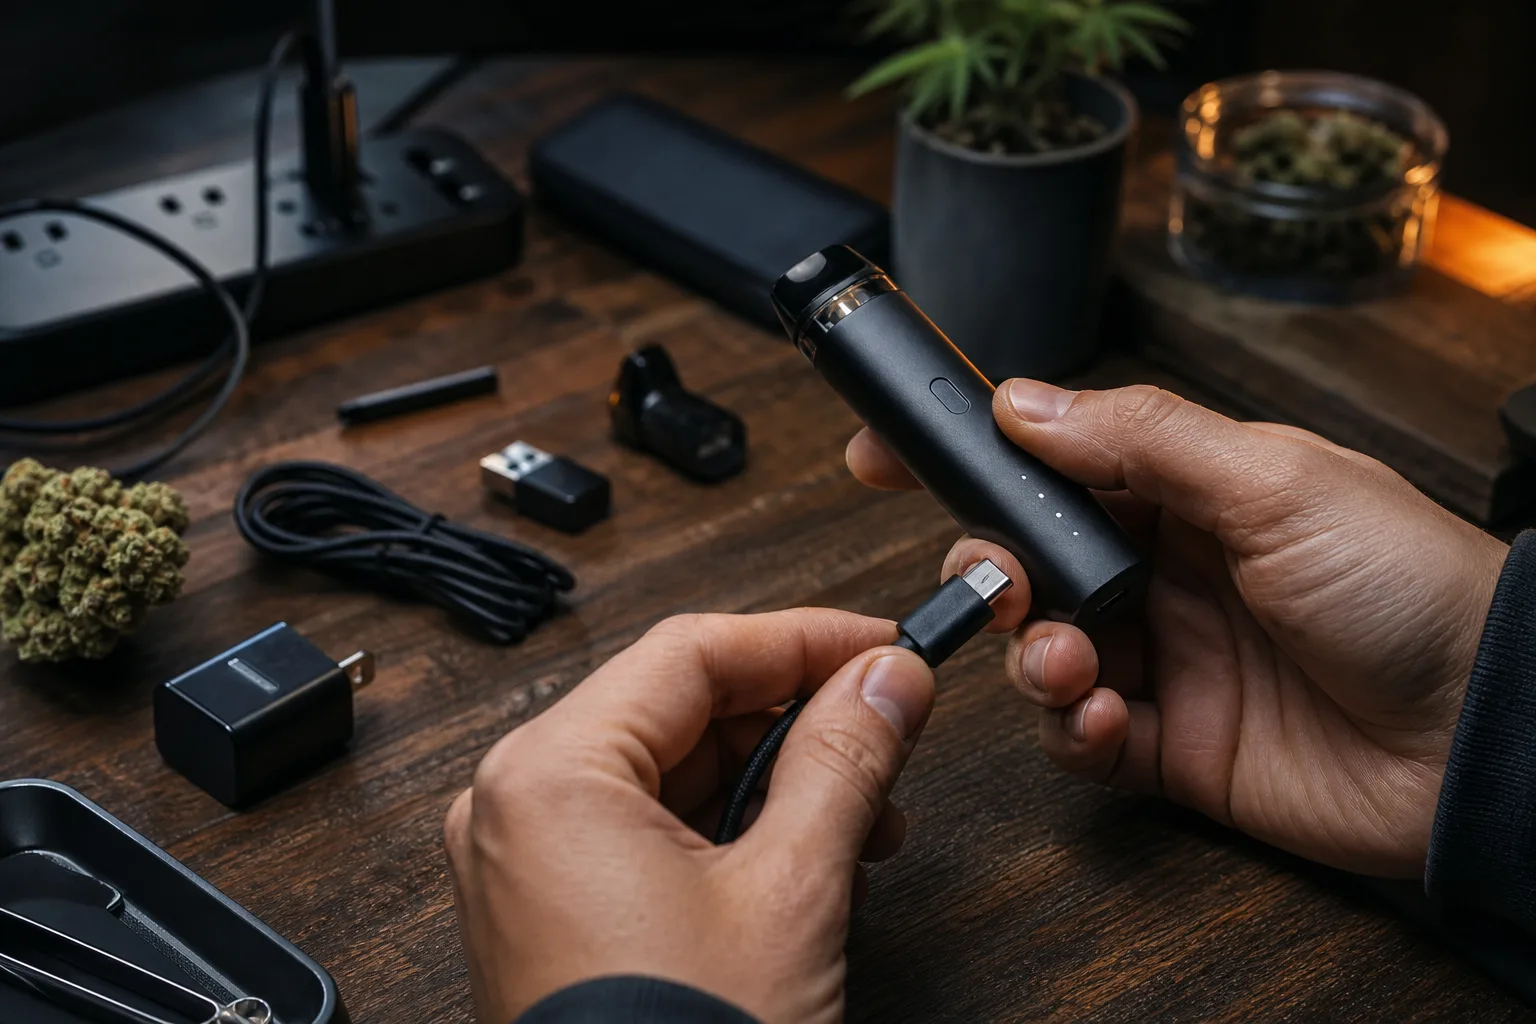
How to Fix a Vaporizer That Is Not Charging
You plug in your vaporizer before leaving home, check the indicator, and see nothing. If you’re trying to work out how to fix a vaporizer that is not charging, start with the cable and power source before assuming the battery or the entire device has failed.
Most vaporizers don’t have a battery problem. They have a charging-path problem. The fault may sit with the cable, power source, port, connection, battery, or indicator light instead.
You’ll check the intended cable and power source before opening anything, buying a replacement battery, or contacting support.
PlanetHaze serves Canadian shoppers with vaporizers, dab devices, and accessories, although charging advice still depends on each manufacturer’s design. Identify the device, test the cable, verify power, inspect the port, watch the light, then assess heat and battery safety. If your device charges but won’t draw, the clogged vaporizer airflow checklist follows the same troubleshooting workflow.
Why the Charging Path Matters Before You Replace the Device
A dead indicator doesn’t tell you which part failed. Your cable, wall adapter, power source, charging port, battery, or light may be responsible, and replacing the wrong component can leave you with the same cold vaporizer and less money in your account.
You also need to separate a simple charging fault from a battery safety problem. Checking the charging path first gives you a clearer replacement decision and reduces the chance that you keep charging a compromised lithium-ion battery.

The cost of replacing the wrong part
If you buy a new battery before testing the cable and power source, you may spend Canadian dollars without fixing anything. The same applies to a replacement charger or even a new vaporizer when a loose connection, unsuitable adapter, or damaged cable is the real fault.
That guess can hide a more serious problem. A battery that is swollen, leaking, cracked, discoloured, or unusually hot needs a safety decision, not another charging attempt. PlanetHaze carries vaporizers, dab devices, and replacement accessories, but compatibility still depends on the device manufacturer and model.
Test the intended cable, verify the power source, inspect the port, watch the indicator, and only then consider compatible replacement parts. Your device’s blinking patterns may add useful detail, so this guide to vaporizer blinking light codes fits the same troubleshooting workflow.
Why the 4–5-charge warning is not universal
Some guidance about rechargeable disposables warns that they may stop holding power after roughly 4–5 charges. That is a limited warning about one product type, not a lifespan rule for every portable vaporizer, extract vape pen, or dab device.
Competitor guidance gives the limited warning this way:
“A rechargeable disposable may stop holding power after roughly 4–5 charges.”
Your rechargeable device may have a replaceable battery, a protected internal cell, a different charging circuit, or a manufacturer-specific service limit. Treat the warning as a reason to identify your device, not as proof that its battery has failed.
The stop-using rule for damaged batteries
Stop using and charging your vaporizer if you see swelling, leakage, cracks, unusual discolouration, or heat that persists beyond normal operation. Do not open, puncture, tape, or casually discard the battery.
Move away from the device and follow local Canadian battery-recycling or hazardous-waste guidance for its next step. If the battery looks normal, continue with cable, power-source, port, and indicator checks before seeking support or buying a compatible replacement.
Practical rule: Diagnose the cable, power source, port, battery condition, and indicator before you replace the device, but stop charging immediately if the battery is swollen, leaking, cracked, discoloured, or unusually hot.
Prepare the Device and Choose the Right Troubleshooting Route
A vaporizer that shows no charging response can involve the wrong cable, a weak power source, a blocked port, or a battery fault. Gather the same basics before testing so you can compare results without mixing chargers or battery procedures.
Your device type also decides what you may safely inspect. Preparation isn’t a repair step. It gives you a controlled starting point and helps you choose the right route before considering replacement parts or support.

Gather the Cable and Power Sources
Place everything on a dry, nonflammable surface with good lighting. Keep the vaporizer switched off unless its manual states otherwise, and separate cables that belong to other devices.
- Vaporizer: Have the complete device ready, including its mouthpiece, tank, pod, or concentrate chamber if these parts normally remain attached during charging.
- Intended cable: Use the supplied or manufacturer-approved charging cable first. Check both connectors for dirt, bent contacts, fraying, or looseness.
- Known-working power source: Prepare a Canadian wall adapter or USB power source that already charges another suitable device. Avoid testing with an unknown adapter first.
- Dry work surface: Keep the vaporizer away from water, loose concentrate, metal tools, direct heat, and anything that could short a contact.
- Manual: Keep the device instructions nearby if available. The manual may identify a required charging method, indicator pattern, or removable battery procedure.
If battery behaviour is part of the concern, PlanetHaze’s guide to why vaporizer batteries drain quickly fits this preparation workflow.
Identify the Battery Design
First, decide which route matches your device. A rechargeable disposable usually has limited serviceability. You can check its cable, power source, port, and indicator, but you generally shouldn’t open it or attempt a cell replacement.
A sealed portable vaporizer has an integrated battery inside its housing. Treat it as closed equipment. Don’t pry it apart to reach the cell, even if the charging light stays dark.
A removable-battery vaporizer requires a separate route. Devices using external 18650 cells must follow the manufacturer’s charging design. Never use a cell that is visibly damaged, swollen, leaking, or missing its protective wrap. Don’t treat that battery like an integrated unit.
Set a Safe Inspection Time
Set aside one uninterrupted session so you can change only one factor at a time. Start with the cable, then the power source, port, battery condition, and indicator. This prevents a different charger or loose cell from confusing the result.
Stop immediately if your vaporizer becomes hot, cracked, wet, leaky, discoloured, or unusually scented. Set it aside safely and seek manufacturer or retailer support rather than continuing the charging test.
Fix the Charging Fault in the Order It Happens
A vaporizer that stays unresponsive after the safety checks needs a controlled sequence, not a new battery straight away. Isolate the fault by changing one link at a time, starting with the cable and ending with the device itself.
Your result determines the next move. If a different compatible cable restores the charging response, you’ve found an external fault. If every check fails, you have stronger grounds to suspect the battery, charging circuit, or a model-specific reset issue.

1. Test the cable and power source
Start with the intended cable. Check its connector type, insulation, ends, and fit. Cuts, bent contacts, looseness, or a connector that only works at an angle indicate a cable problem. Test a known-working compatible cable, then use a Canadian wall adapter or USB power source that already charges another suitable device. Don’t assume a computer port provides consistent charging power.
Success looks like an indicator light, charging symbol, or other response described in your manual. If the new cable works, replace only the cable. Innokin says replacing the charging cable will usually fix a vape pen that isn’t charging, according to its charging guidance. If neither cable responds, keep the compatible cable connected and move to the power source.
Before: “The USB cable looks fine, so the vaporizer must be broken.”
After: “A known-working USB-C cable and a Canadian wall adapter produce no indicator, so the port becomes the next check.”
2. Inspect the port and seat the connector
Under good light, inspect the charging port for lint, residue, bent contacts, moisture, or movement inside the housing. Remove loose lint only with a non-metal tool or soft, dry brush. Never force debris deeper, scrape contacts, or use liquid. A clean port should accept the connector fully without unusual resistance.
Reseat the cable straight, without twisting or forcing it. You should see a firm connection that doesn’t drop out when the device rests on a flat surface. If charging begins only when you hold the connector at an angle, stop stressing the port. That result points to a damaged connector, worn port, or internal connection.
3. Read the light and allow the device to cool
Observe the indicator while the vaporizer is connected. Compare steady, flashing, absent, or colour-coded behaviour with the model’s manual because each device uses different signals. A charging light that appears briefly and stops may indicate a poor connection, temperature protection, or a battery fault.
If your device feels hot, disconnect it and let it cool fully before another test. Don’t charge a hot, wet, cracked, leaking, discoloured, or unusually scented vaporizer. If cooling restores normal charging, monitor it closely. If the light remains absent after the device cools, continue to the battery check rather than repeatedly reconnecting it.
4. Check the battery and reset the device
Only after the cable, power source, port, connection, indicator, and temperature checks should you assess the battery. Look for swelling, leakage, damage, or a missing protective wrap. Don’t remove or replace an integrated battery yourself. A removable cell that shows damage should be isolated and handled according to local battery-disposal guidance.
Use a reset procedure only when your model’s manual confirms it. A successful reset gives you the expected light or charging response without heat or unusual behaviour. If no safe reset applies, PlanetHaze customer support may help identify a compatible replacement or warranty route, although support can’t inspect hidden internal damage remotely.
- Cable: You have tested the intended cable and a known-working compatible replacement.
- Power source: You have tested a reliable Canadian wall adapter or USB source.
- Port: You have inspected and gently cleared the port without metal tools or force.
- Connection: You have reseated the connector straight and checked for looseness.
- Indicator: You have compared the light pattern with your manual.
- Temperature: You have allowed the device to cool fully before retrying.
- Battery: You have stopped when you found swelling, leakage, heat, or visible damage.
Charging Symptoms, Likely Causes, and the First Fix for Cannabis Vaporizers
A dark light doesn’t prove that your vaporizer battery has failed. You may be dealing with a cable, power source, connection, port, or model-specific indicator behaviour instead. Treat each symptom as a separate clue, not as proof of one universal fault.
Use the first fix below before considering compatible replacement parts or support. Changing one factor at a time helps you avoid damaging the port, battery, or charging circuit.

No light after connecting
If you see no light or charging response, test the intended cable and a known-working Canadian wall adapter or USB source first. Some vaporizers illuminate only under specific charging conditions, so check the manual before treating a dark indicator as a failure.
| symptom | likely cause | first fix |
|---|---|---|
| No light or charging response | Faulty cable, inactive power source, poor connection, or a device-specific indicator behaviour | Test the intended cable and a known-working Canadian wall adapter or USB source, then check the manual |
| Charging starts and stops | Worn cable, loose plug, debris, or damaged charging port | Reseat the connector gently, try a known-working compatible cable, and inspect the port |
| Plug feels loose | Port wear, bent connector, or debris preventing full insertion | Disconnect, inspect under good light, and do not force or hold the plug at an angle |
| Device becomes hot while charging | Thermal protection, unsuitable charging equipment, or battery fault | Disconnect and let it cool; stop using it if heat returns or damage is visible |
| Flashing fault pattern | Model-specific warning or charging error | Record the pattern and consult the device manual or manufacturer instructions |
| Removable battery is swollen, leaking, cracked, or unwrapped | Unsafe physical battery damage | Do not charge or use it; isolate it safely and follow local Canadian battery-disposal guidance |
Charging starts and stops
Intermittent charging usually points to movement, contact, or debris. Reseat the connector gently on a stable surface, then test a known-working compatible cable. If charging changes when you touch the plug, stop holding it at an angle, because the port or connector may be damaged.
- Metal tools: Do not force lint or debris from your charging port with a needle, pin, knife, or other metal object. You could scratch contacts or create a short.
- Unverified cables: Do not assume a cable fits safely because its connector looks identical. Use the cable and charging equipment specified for your vaporizer.
- Swollen batteries: If a removable battery is swollen, leaking, cracked, or unwrapped, stop charging immediately. Do not press, puncture, rewrap, or test it in another device.
Heat, flashing lights, or battery damage
A hot device needs cooling and inspection, not continued charging. Disconnect it, place it away from flammable materials, and let it cool fully. If heat returns, or you notice swelling, leakage, cracking, or a damaged wrap, stop using the device and follow local Canadian battery-disposal guidance.
Flashing lights are model-specific. Record the exact pattern and consult the manual or manufacturer instructions before interpreting it, because the same colour or sequence can mean different things across vaporizers.
Confirm the Vaporizer Is Actually Charging
A single flash from your vaporizer’s indicator doesn’t confirm a repair. Watch the charging behaviour, check the physical connection, and confirm that the battery gains usable charge before relying on the device.
Your cable-to-device connection matters throughout this check. A Vuse troubleshooting guide explains that a poor connection can prevent a vaping device from charging. Verify the connector without forcing it, then judge the result through several signs rather than one brief light.
What a stable charge looks like
Start by checking the indicator against your device manual. You want a light pattern that remains stable, changes as charging progresses, or matches the documented charging state. If your model has limited indicators, you may need to confirm the result through battery performance instead.
Weak check: “The light flashed once, so the battery must be charging.”
Strong check: “The AirVape Legacy shows its documented charging light, the USB-C connector stays seated, and the indicator changes normally after the charging cycle.”
- Indicator behaviour: You see a stable pattern that matches the manual, rather than one unexplained flash.
- Connector position: You confirm that the cable remains seated without pressure, twisting, or repeated wiggling.
- Device condition: You find no swelling, leakage, cracking, unusual heat, or damaged battery wrap.
- Usable charge: You confirm that the vaporizer gains enough charge to operate normally after the expected charging period.
How to test without stressing the battery
Leave the device undisturbed while it charges. Don’t press the connector inward or repeatedly unplug and reconnect it, because movement can hide an intermittent port or cable fault. When the charging behaviour looks normal, disconnect the power and check whether the device has gained usable charge.
Only test your vaporizer after it is cool, intact, and free from leakage or swelling. Use the normal power button or temperature control once, rather than repeatedly activating the device to force a response. If it works normally, monitor the next charging cycle too.
What information to send for support
If the fault remains, repeat the cable, power-source, and port checks once in that order. Then stop improvising. Contact PlanetHaze support or the manufacturer with the details below so you don’t guess at a battery or replacement part.
- Device type: You provide the brand, model, and whether it is a portable vaporizer, dab device, or extract vape pen.
- Cable tested: You identify the cable and whether another compatible cable produced the same result.
- Power source: You name the wall adapter, computer, or other source used.
- Indicator behaviour: You describe the colour, pattern, and whether the light stays stable.
- Battery condition: You report heat, swelling, leakage, cracking, or other visible concerns.
How to Reset Vaporizer Charging Safely
If your vaporizer still shows an unusual charging response, a reset may clear a temporary control state. Don’t treat it as a repair, though. The correct reset depends on your portable vaporizer, dab device, or extract vape pen, and some models have no user reset at all.
Before trying any button sequence, disconnect the charger, inspect the cable and port, let your device cool, and check its manual. Rule out an external charging fault before asking the electronics to reset.
How to reset vaporizer charging
To reset vaporizer charging, follow only the method listed for your exact model. Some devices use a button sequence, a full power cycle, or a charger disconnect, while others provide no user reset. Disconnect the cable first, inspect the port, let the vaporizer cool, and use the manufacturer’s instructions before pressing buttons or reconnecting power.
Whether a reset can fix a charging problem
A reset can clear a temporary control-state or protection response, but it can’t repair a damaged cable, blocked port, failed battery, or unsafe cell. Check the charging path first. If the device remains unresponsive after the approved reset, stop testing it and arrange support rather than assuming the battery needs replacement.
Checks to make before resetting a vaporizer
Before resetting, disconnect the charger and check the cable for cuts, bent connectors, or looseness. Inspect the charging port for lint, residue, or damage, then allow the device to cool fully. Confirm the manual’s reset instructions and check whether the indicator shows a heat, battery, or connection warning.
What to avoid when resetting vaporizer charging
Don’t open a sealed vaporizer, short charging contacts, bypass battery protection, or repeatedly reconnect a hot device. Avoid copying a button combination from another model because similar vaporizers may use different controls. If your manual gives no reset method, repeat the external checks once, then contact PlanetHaze support or the manufacturer with your device details.
Start With the Cable, Then Move One Link at a Time
After checking the reset guidance, return to the charging path rather than guessing. Your vaporizer may need a different cable, power source, or connection, while another device may have a battery fault that external checks can’t solve.
You don’t need to buy a replacement first. A controlled check on the vaporizer in your hand gives you better information and helps you avoid ordering an incompatible battery, charger, or replacement part.
Begin with the cable and power source
Identify whether you have a rechargeable disposable, a sealed portable unit, or a model with a removable battery. You need the correct charging method for that design. Use the intended cable, then connect it to a known-working Canadian wall adapter or power source rather than assuming every USB connection supplies the same result.
Change only the power source after testing the intended cable. You can then tell whether the fault follows the cable or stays with the vaporizer. Keep the device switched off while you test, unless the manufacturer specifically requires another charging procedure.
Follow the port, light, and battery checks
Inspect your charging port under good light. Look for lint, residue, bent contacts, looseness, or moisture, but don’t push metal tools into the opening. Seat the connector fully without forcing it, then read the indicator according to your manual because a flashing, coloured, or absent light can mean different things across models.
While charging, check your device for unusual heat, swelling, leakage, cracked housing, or a damaged battery compartment. Stop using it if you notice damage or excessive heat. Manufacturer instructions remain important for model-specific light codes and resets, even when the external connection appears normal.
Escalate only after the checks fail
- Identify the device: Confirm whether your vaporizer is a rechargeable disposable, sealed portable unit, or removable-battery model, and keep the model name nearby.
- Test the intended cable: Use the cable specified for your device and check whether the indicator responds.
- Change the power source: Connect that cable to a known-working Canadian wall adapter or power source.
- Inspect the port: Check for debris, moisture, bent contacts, or looseness without probing inside.
- Confirm the connection: Seat the connector fully and watch whether movement interrupts charging.
- Read the indicator: Compare the light or display with your model’s manual rather than another vaporizer’s code.
- Check condition: Stop if your device becomes unusually hot or shows swelling, leakage, cracks, or battery damage.
- Choose the next step: Only after these checks fail should you consider compatible replacement parts or contact PlanetHaze support with your documented results.
If you need help choosing compatible vaporizers, chargers, or accessories, PlanetHaze answers product questions and publishes guidance for adult consumers, concentrate users, and beginners. Find practical maintenance help in the PlanetHaze vaporizer education articles. Start with your current device’s cable and power source before placing a replacement order.